Loading... Please wait...

How it Works
CLINICAL USE
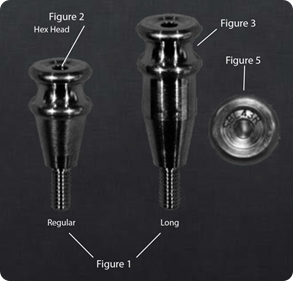
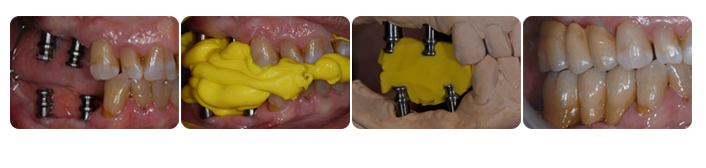
First, select the bite post that corresponds with your desired implant platform. The Implant Bite Posts™ come in regular or long. You simply select the post that matches your vertical needs. (Figure 1)
Hand place and screw the bite post in place with light finger pressure. The top of the bite post has a .050 universal hex that may be used to remove the post if needed. (Figure 2)
The two circles at the apex of the bite post are designed as an undercut to capture and retain the bite material. (Figure 3)
The circles are round and aligned with one another so that the undercut creates 360 degrees of diametric opposition that will hold the registration firmly in place even if the facial of the bite requires 90 degrees of cut back.
After the bite is taken, remove the bite and the Bite Post, sterilize them both, and clearly identify which Bite Post belongs to which implant site before sending the case to the lab. Laser engraving for product identification. (Figure 5)
When seating the bite post into the stone model, on occasion it may be necessary to reduce stone around the implant entry site to be certain that the Bite Post is fully seated. When sending the case to the lab, always remember to clearly identify which bite post belongs to which implant site.
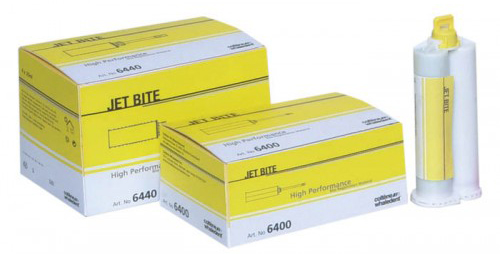
BITE MATERIAL
Always use high consistency polyvinylsiloxane addition type bite material like Jet Bite™ by Coltene-Whaledent. These softer memory perfect materials can easily be navigated on and off the Implant Bite Posts™ without any change in the bite. Never use rigid or crumble prone bite material as the undercuts in the Implant Bite Posts™ will likely destroy the bite registration.